Test Title 1


Showing posts with label kitchen. Show all posts

so long, cupcake ...

move over, macaron. make way for the latest food craze ... the gourmet marshmallow.

confession: i have a major sweet tooth ... and i'm a sucker for sweet sticky marshmallow goodness. need proof? how about the 1/2 eaten bag of kraft jet-puffed giant mallows in our pantry. 

check out these yummy treats from nashville's own the bang candy company:

{source: bang candy company}

owner sarah souther began experimenting w/ homemade marshmallows in the summer of 2010. her friends quickly became fans and within weeks, she had requests for orders. by september, she launched the bang candy company and marshmallows became her full-time job. check out the bang candy company's variety of yummy fluffy confections ... everything from the original rose cardamom to chocolate chile to toasted coconut. each hand-dipped in belgian milk chocolate.

want to experiment on your own marshmallows? wade and i gave it a go over the holiday thanks to this recipe/blog from the smitten kitchen. and there will be several future experiments! ;) yum!

mon-DIY: hanging shelf

last friday i shared the little secret that w + i were looking @ a house over the weekend. and not just any ol' house ... but a little farmhouse on 9 acres of land! my poor green-thumbed husband is getting incredibly restless. currently we live in a teeny little apartment w/ a window box. an unsuccessful windowbox at that.

so over the weekend, i also decided it was time to utilize what little sunshine we do have:


supplies:
- wooden board cut to fit your window (i used a piece of hickory @ 36"x 5" x 1 1/4")
- 2 long strips of webbing (i used 2 10' strips) 
- a sturdy curtain rod (or 2 hooks) to hang

tools:
- sandpaper
- wood stain
- hand drill

1 // drill a hole in each corner of your board approximately 1/2" from the edges. lightly sand the edges and around the holes to smooth. (if you want to stain your shelf - do it now!)

2 // use 1 piece of webbing for each short side of your board. fold the strip of webbing in half. push one end of the webbing through one corner hole & tie a knot. then push the opposite end through the other hole and tie a knot.

3 // hang your shelf from your curtain rod (our's was a 1 1/2" wooden rod - very sturdy) or hooks. adjust the knots at the bottom to find the correct height. use a level also to make sure the shelf was level.


yes - i admit those plants look PUNY! and thus the need for our window shelf. enjoy!

{ PINspired }

still feeling under the weather (though i did stay up much later than my husband) last night. so instead ... i thought i'd share a little {PINspired} project that i finished a few weeks ago but only last weekend finally got around to hanging in our home.

today's {PINspiration}: these adorable mason jar/pipe clamp projects are so popular right now!

 {source: 1 // the cutting edge of ordinary, 2 // pinterest, 3 // not just a housewife, 4 // old new again on etsy}

instead of using a mason jar - i decided to use a pipe clamp, an old piece of crown molding from the preservation station + a soap dispenser (from target) we received for our wedding. before the soap dispenser awkwardly sat on our pedestal sink - occasionally falling off the edge - and thankfully not shattering. unfortunately we couldn't hang the piece of molding bc of the tile. so i improvised! i drilled a couple of holes and laced it with a piece of ribbon to hang from our mirror. 


of all the inspiration i've found - my ultimate favorite is the hanging garden by not just a housewife. we have a million katrillion mason jars from our wedding last year. someday i will create a little hanging herb garden w/in our kitchen ... someday when 2/3rds of the walls in our kitchen aren't windows! which is your favorite?

and here's a little bonus {PINspired} project i did earlier this summer and never got around to sharing. i found the spice jars at a little antique shop. speaking of herbs, how cute are these little tea tin planters by larking about on flickr? yup! doing this.


{PINspiration}                                                     {PINspired}
{left source: martha stewart}

wade said yesterday that i was making too many pinterest puns. sorry, peeps. i'll try to limit it to only my {PINspired} posts. ha ha.

at last ... our kitchen chairs!

remember this post ... and this post ... and this post? all dedicated to my search for 1950s era school chairs for our kitchen table.

to be honest - i had about given up. each time i thought i had found them ... i soon discovered that they were preschooler tiny, gah! i even looked into the restoration hardware versions (like we could really afford anything from there) ... again they were for tiny tots. each time i got downhearted, i reminded myself that ashley ann of under the sycamore had found the perfect chairs - and all 6 for just $12. a glimmer of hope. {how melodramatic i am!}

i decided - one last thorough craigslist search of not only the nashville area ... but the entire state of tennessee and basically the entire south (i didn't mention that to wade!). and i found a listing for 13 chairs in knoxville @ $5 a piece or 3 for $12. in an effort to save us a trip, i asked the seller if he would take a picture of an adult sitting in the chairs. and he was so cooperative. (oh boy do i wish i had saved that picture! hee hee.)

from this new picture, they looked perfect. then again there was the chance that he was 5'1"! that is why we decided to camp. so that our labor day trip to knox wouldn't be a complete wash.

guess what people ... it wasn't! they are PERFECT!

180 miles, 4 dollars a piece, 6 fantastic chairs ...


0 wads of gum ... and only 1 cuss word. okay so maybe eventually we will have to sand the wood and restain. for now, old english polish is doing the trick. and i kind of like the little memories marked on each chair.


they had 5 identical chairs - and 2 additional slightly different chairs we could choose from. wade chose the 1 that matched in color and height. "the captain's chair" he declared. it is perfectly different w/ a handy little spot for my favorite cookbooks.


COMPLETE - at last!


or at least i thought it was ...

i have been lusting after a window greenhouse like this one {left} via martha stewart some time now. unfortunately our kitchen windows aren't inset. but could this hanging shelf DIY {right} shared today on under the sycamore be the perfect compromise!?! there goes my fun money for october! :)

{shop} plümo

i am absolutely in love w/ these hand-blown glasses available through plümo. they are exactly like the ones we used everyday during our honeymoon. i searched the souks in both marrakesh and essaouira for something similar only to find out via plümo that they are algerian not moroccan after all. that explains why i couldn't find them!

http://www.plumo.com/product_images/t/241/Algerian_Glassware__28809_zoom.jpg
{source: plümo}

our first anniversary is just around the corner in september (crazy, eh?). i thought this would be a cute little addition to our collection - plus a perfect time to buy w/ them on sale! but i've attempted to put in an order 3 days in a row. :( supposedly plümo has my item on hold - and has emailed me a shipping quote to approve.

anybody else tried to order from them and had trouble?

child-sized

i found an ad for 4 american seating co envoy chairs this morning during my routine craigslist search. routine bc i have a small list that i plug in to craigslist once or twice a day. yes - i'm obsessive. vintage 1950s school chairs top my {someday} list for our kitchen. i have half of illinois searching w/ me! (feel free to join in on the fun.)

and so i anxiously called and left a message.


{source: moomah.com ... yes i've shared before!}

i have been holding my breath since 9am. but just now heard back. unfortunately these guys are perfect for little guys and not suitable for a standard table.

and so the search continues ...

in the meantime, additional inspiration via moomah - a cafè/art space/kiddo creative paradise in nyc:


... i want to go to there.

{shop} anthropologie

i have a slight obsession w/ measuring cups - so many cute options! but this is my ultimate favorite. i'm sure of it. check out these milk bottle measuring cups from anthropologie. i'm in love:

{click to shop}

tues-DIY: pinwheel magnets

finally, i found free time this weekend to finish a couple projects! first, a super easy one.

i'm loving pinwheel's right now (remember my pinwheel necklace DIY). so of course i find these pinwheel push pins from anthropologie absolutely adorable:


however - because i don't have a cork board, here's a little DIY to make pinwheel magnets:

supplies:


* several different scrap pieces of fabric
* needle and thread
* piece of poster board (for a pattern)
* a piece of felt
* self-adhesive magnets
* tacky glue
* scissors

1 // trace a bowl or lid onto the poster board to create a pattern. the pattern needs to be twice as wide as your intended yo-yo plus 1/2" for seam allowances. my finished yo-yos are 2" wide - so i traced a lid that was 4 1/2" across.

2 // trace your pattern on the wrong side of your fabric and cut out your circle.


3 // with the right side of the fabric facing down, fold in the edge of your circle about 1/4". starting w/ the wrong side facing toward you, stitch close to the folded edge around the circumference of the circle (overlapping your first stitch).

you can vary the size of your yo-yo center by varying your stitch length. shorter stitches create a more open center while longer stitches make for a tighter center. i used a longer stitch.


4 // pull the thread carefully until the edges gather in the center. then tie a knot and clip the excess. you can tuck the knot and the excess into the center hole. flatten the yo-yo so that the center hole is centered on top.


now to make magnets:

5 // cut a circle out of your felt that is a little smaller than your finished y0-yos. cut your self-adhesive magnet to fit and attach it to the felt circle.


6 // with tacky glue, attach the felt to the back of the yo-yo.


if you want to create push pins: push the point of your pin through the felt. then add glue to the side of the felt with the top of the pushpin (not the point). glue your felt circle to the back of the yo-yo.

voila!! go yo-yo crazy!


want your yo-yos to look exactly like the anthropologie push pins? string 3 beads and stitch them to the center of your yo-yo before adding the felt to the back.

weekend update: kitchen built-ins

remember how not one but two of our plates fell and broke?

a recap: i wanted to display our dishes on the built-ins in the kitchen. so i found self-adhesive vinyl foam weatherstripping at ace hardware and went to town. and the cabinets have looked beautiful since sept! then when wade and i returned home after the holidays - we found that the adhesive didn't keep in the cold - and we had 2 broken dishes (thankfully - just 2). "weatherstripping" apparently doesn't mean "weatherproof".

to be honest, i was disappointed and a bit defeated. we have such limited cabinet space. the dishes sat stacked on our washer/dryer all week while we considered our options. a little proof of our lack of space:

{our ghetto dishwasher ...}


{... has been re-purposed as a storage cabinet}

our mission this past weekend - to find a fix & still use the built-ins.

the culprit - this NOT weather-proof foam:


the solution - little square dowel rods, three nails each dowel and a can of paint:


and now my babies are safe again!


thanks to my live-in handyman!


we also squeezed in:
* a trip to the nashville bead show with taylor
* a hair cut
* a few humphrey bogart films from the collection i bought wade for christmas †
* a hike at edwin warner park
* dinner with matt and jana
* dinner with whitney and sean
* a date night at yellow porch (yum!)
* a calvin house meeting
* church
* sam's with jason and the boys
* 2 movies (true grit - excellent + the dilemma - eh.)
* laundry
... and *2 crafts

shouldn't every weekend be a 3-day weekend!?!

† i'm thinking a new blog category called "HUMP DAY" which would include movie reviews of the latest humphrey bogart film wade and i have seen. hee hee. okay maybe not.

so tired ...

i have a benedryl hangover - 2nd day in a row. and i'm barely keeping afloat during work today. :( not good considering things are piling up at the office AND at home.

i'm not sure what i've reacted to ... but i'm covered head to toe in a lovely rash. probably another food allergy. and poor husband has dealt with a puny wife for the past 3 days. last night completely fed up, i coated myself in hydrocortisone cream and hit the sack before 7.30.

i still have my list of "to do's" that aren't getting "to done" while i'm half present. but i started on the kitchen windows and wanted to share.

remember my dream window coverings for the kitchen:


i bought a set of 16 mismatched vintage doilies on etsy and now i simply plan to sew them to ribbon and tie them up. (notice the pushpins in the meantime.)


what do you think?

tues-DIY: bedside lamps + a little "house" keeping

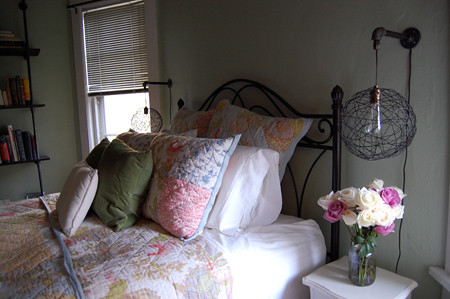
finally ... pictures of our latest finds and our bedside lamps!!!

remember how i lost my camera on our way home from morocco? well now we share wade's camera ... and the card reader on his work computer. yikes. we really need to invest in a new card reader - but in the meantime ... i wait patiently {okay somewhat patiently} for him to find a little free time while at the office.

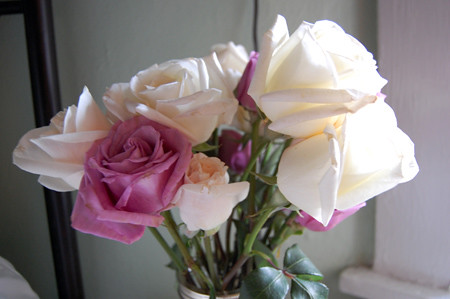
but i must say, it was worth the wait. keelie and eric sent us home with a bundle of flowers from the wedding - perfect for staging. if only i always had live flowers scattered around the house.

first the reveal of our illinois finds:

1) remember this guy?


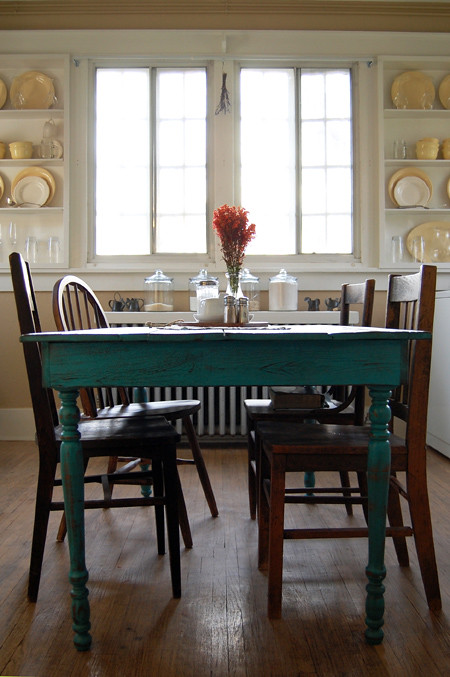
introducing ... our brand new kitchen table:


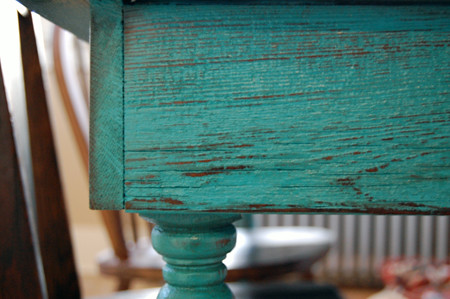
yes - it's teal! wade and i didn't set out to buy a teal kitchen table. but we instantly fell in love with it. it gives the kitchen a whimsical feel. (suitable - we found it at wonderland - that antique store we came upon in palestine, il.) and works with our neutral dishware.


{any idea what those orange flowers are??? i love them! esp against the teal.}

2) and remember this guy?


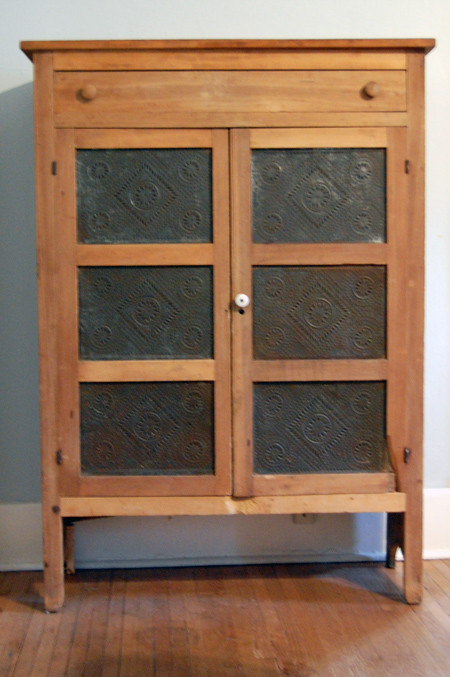
introducing ... our brand new (okay ... 150 or so year old) pie safe.


i wasn't going to reveal her yet - as we still haven't unpacked our china. but soon - very soon - this will be our china cabinet. super thrilled!

we had been looking for a painted pie safe in a robin's egg blue or other pastel ... but couldn't pass up the deal that we got on this one (again in palestine, il). and w/ a teal kitchen table, i think we made a wise decision.

----------------------------

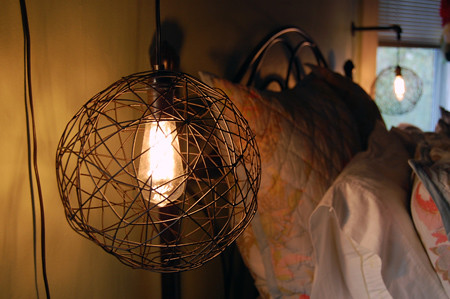
last but not least ... a little update on our DIY bedside lights:

supplies per lamp:

* whatever you choose to use as your lampshade. we found our "decorative balls" (that's what it said on the shelf) at target for $9.99 each.
* paper lamp cordset w/ cordswitch (we ordered this from www.grandbrass.com)
* socket (again we ordered this from www.grandbrass.com)
* light bulb - we went with filament light bulbs from pottery barn bc we knew they would show.

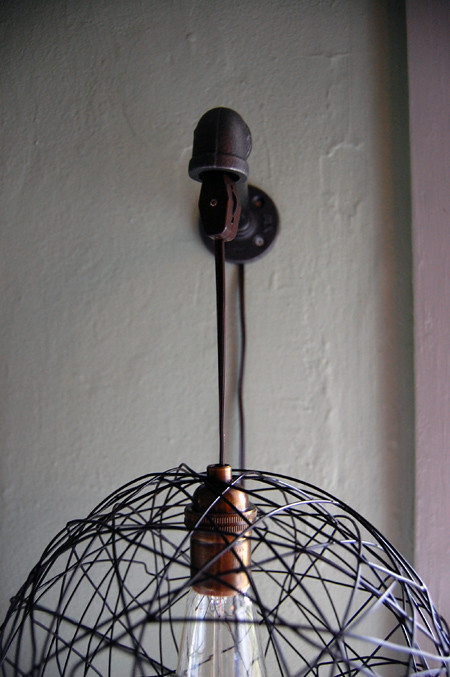
instead of hanging the lamps from the ceiling we used pipe to create a wall-bracket:

* flange (from hardware store)
* 8" pipe (from hardware store)
* 90º elbow (from hardware store)

wade cut off the butterfly socket on the paper lamp cordset and replaced it with the brass socket. we decided that we wanted the cordswitch to sit just below the 90º elbow so we cut and reconnected the cord to the cordswitch once it was cut to the right length and filtered through the pipe wall-bracket.


luckily wade knew exactly what to do! but for those who haven't worked with lamps before ... i found a great tutorial on DIY hanging lamps @ shamelessmag.com.

and the outcome:


{by day}

{by night}

well - what do you think? i've been seeing a lot of other great lamp DIYs online. including mason jars ... and one with an industrial sized whisk. loved it! however that would be quite the flea market find. any other ideas you've seen?

oh ... and one more beautiful bouquet from the wedding.


Related Posts Plugin for WordPress, Blogger...
Read more: http://www.scratchtheweb.com/2013/05/how-to-show-disqus-comment-count-links.html#ixzz2bxYckbeB Follow us: @scratchtheweb on Twitter | scratchtheweb on Facebook