


i began the day by "undecorating" the christmas tree. maybe my least favorite thing to do ever. (the apt is going to look so boring with out our sparkly fantastic christmas decor.) i took advantage of the after christmas sales w/ mom and found some new lovelies for next year. and now of course completely want to redecorate the tree!!!
a few of my favorite finds:

{cute little wooden star & heart ornaments}

{the perfect topper for our tree - or too blair witch!?!}

{and i found several hand-stitched lovelies - including these 2 miniature joy frames.
can you say inspiration for future christmas presents!?!}
i've been craving a pair of i go by katie's moccasins --- darlingtoniamoccasins.com --- for a long long time now. especially her tiger lily moccasins. cute cute cute:
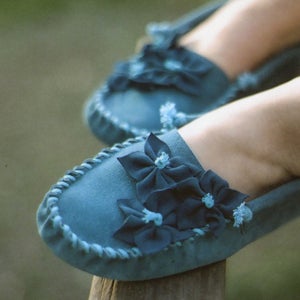
{photo courtesy: darlingtoniamoccasins.com}
let's face it kids - money's tight! at a buck 30 a pair ... i'll either have to save fun money for a few months - or i'll have to find a leather dealer + a pattern and try my luck. yikes. not sure i'm this confident!?!
but while perusing* her site, i came across her bow belts - super cute. and these i COULD make!!! and i could find leather w/ a quick trip to joann fabrics! introducing ... "the oh bow-y belt":
* sidenote: i always misspell perusing - paroozing. seriously though? they could have made that word so much more fun w/ a jazzier spelling!!!
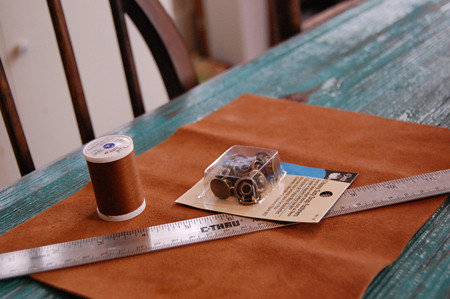
materials
* leather (ideally you can find LOOONG strips of leather - 1 long enough to fit around your entire waist. i couldn't in town - so i purchased 2 8.5" x 11" leather trim pieces from joann fabrics ... i cut 3 2"x11" strips as the belt + 1 3"x5.5" as the bow and 1 1"x3" as the bow's loop.)
* heavy duty thread to match
* heavy duty brass snaps
* ruler
* scissors
* hammer
* sewing machine
*** if you're not a seamstress, i read recently that leather is very porous so fabric glue forms a very firm bond ... let me know if you give it a go! ***
directions:
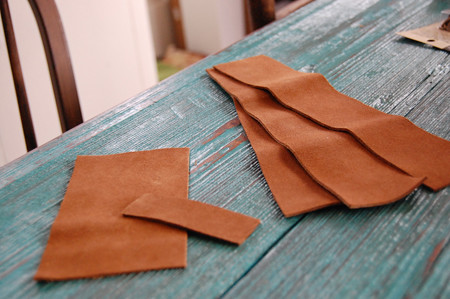
step 1) measure & cut out all of your pieces.
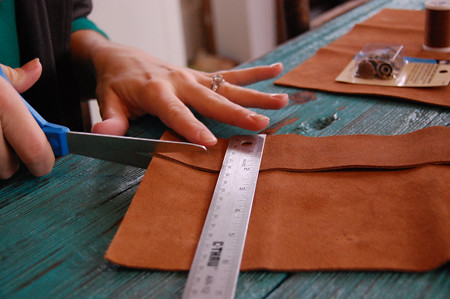
again - you'll need:
a. 2" wide strips for the belt. enough to wrap around your waist + 1/2" overlap for the fasteners + 1/4" overlap for seams. {i used 3 2"x8.5" strips and had 2 seams.}
b. 1 3"x5.5" strip for the bow
c. 1 1"x3" strip for the loop in the bow
(for future, i'll refer to them as belt, bow and loop.)
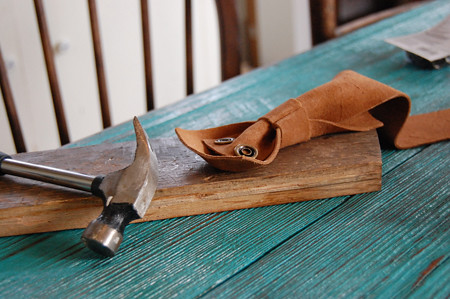
step 2) match the 1" wide right side ends of your loop strip and sew to create the loop. reverse the loop so that the seam is on the inside.
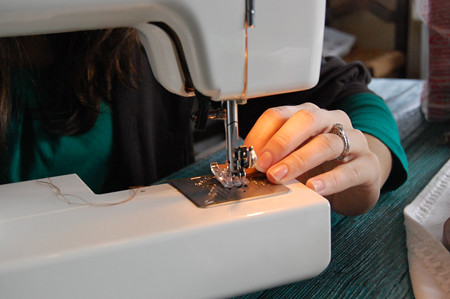
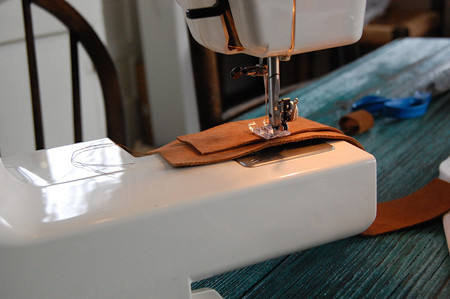
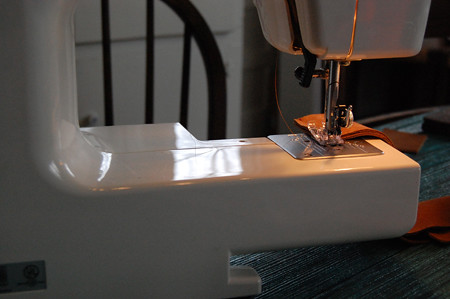
step 3) place the bow strip right side down on your table and align one of your strips right side down on top of it leaving a 1/2" of the bow strip excess. sew the strips together at the center width-wise. (can you follow? luckily - i have pictures!)
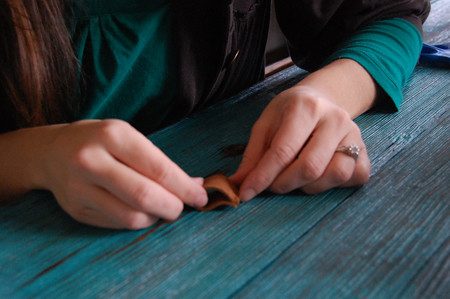
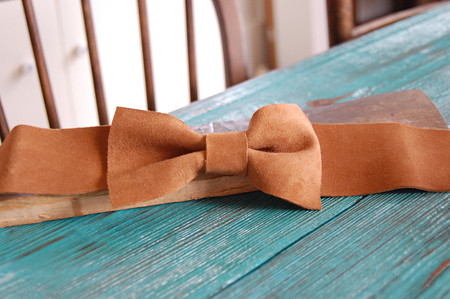
step 4) fold the piece you just sewed into an "m" with the right side out or at top when looking at it from the end. then push this part through your loop (with the seam facing the bottom of the "m"). pull until the loop is directly over the middle of the bow strip (where we just sewed).
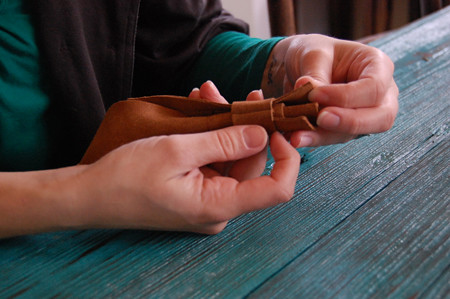
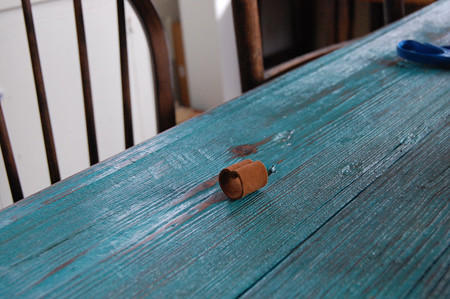
you'll end up with a perfect bow!
(i'm thinking i'll use the scraps to make another bow for a headband!)
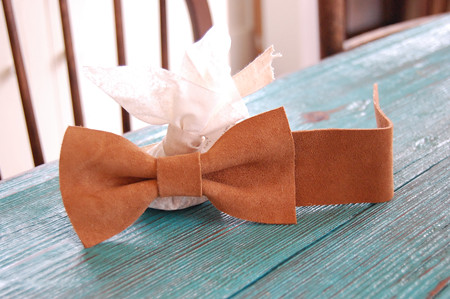
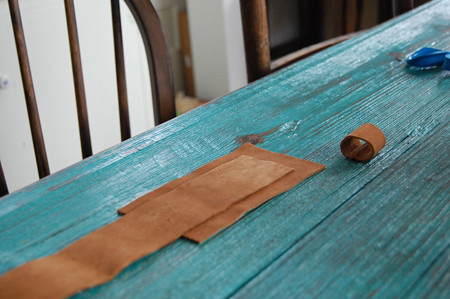
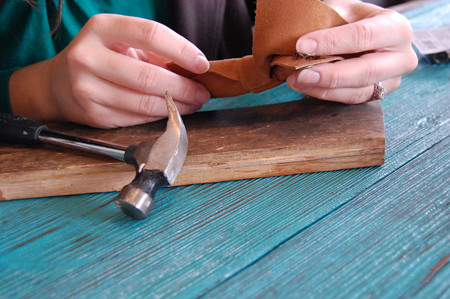
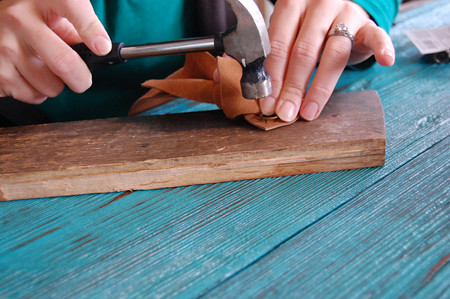
step 5) remember the part of the belt that was 1/2" shorter than the bow strip ... this is where you'll add the female fastener. you'll add the male fasteners to another belt strip. follow the instructions on the fastener box. (i'll admit ... this took me a couple practice fasteners!!!)
here's a front and back of our progress so far:

step 6) at this point ... we just need to add the excess belt strips to fit the belt around your waist. you'll sew together right sides of your remaining strips w/ a 1/4" seam until your belt fits.
i removed about 3" from the male fastener strip (we created in the last step) so that i had a seam 6" from the both ends of the bow at my sides. w/ this 3" gone, it took one more 8.5" long strip to finish off the belt. (again measure to include a 1/4" seams.)
and there you have it just in time for your new years celebration if you're like me and not brave enough for sequins!!! one festive bow belt:
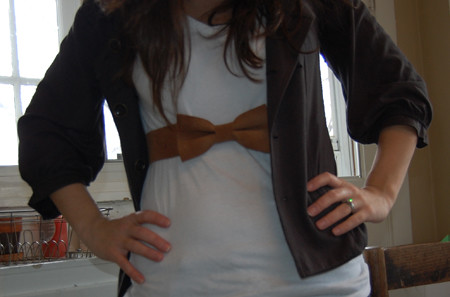
PS - i told wade today during lunch that i was feeling "hip-y" in all of my pictures. he said we'll it's probably the way you're wearing your hair - long and over your shoulders like that. i was like "huh". then finally i realized he meant "hippie". oh boy! yes - i am in fact looking "hippie":

PSS - big thank you to my sister leigh & bro-in-law brandon for my gorillapod! LOVE IT!!!
but while perusing* her site, i came across her bow belts - super cute. and these i COULD make!!! and i could find leather w/ a quick trip to joann fabrics! introducing ... "the oh bow-y belt":
* sidenote: i always misspell perusing - paroozing. seriously though? they could have made that word so much more fun w/ a jazzier spelling!!!
materials
* leather (ideally you can find LOOONG strips of leather - 1 long enough to fit around your entire waist. i couldn't in town - so i purchased 2 8.5" x 11" leather trim pieces from joann fabrics ... i cut 3 2"x11" strips as the belt + 1 3"x5.5" as the bow and 1 1"x3" as the bow's loop.)
* heavy duty thread to match
* heavy duty brass snaps
* ruler
* scissors
* hammer
* sewing machine
*** if you're not a seamstress, i read recently that leather is very porous so fabric glue forms a very firm bond ... let me know if you give it a go! ***
directions:
step 1) measure & cut out all of your pieces.
again - you'll need:
a. 2" wide strips for the belt. enough to wrap around your waist + 1/2" overlap for the fasteners + 1/4" overlap for seams. {i used 3 2"x8.5" strips and had 2 seams.}
b. 1 3"x5.5" strip for the bow
c. 1 1"x3" strip for the loop in the bow
(for future, i'll refer to them as belt, bow and loop.)
step 2) match the 1" wide right side ends of your loop strip and sew to create the loop. reverse the loop so that the seam is on the inside.
step 3) place the bow strip right side down on your table and align one of your strips right side down on top of it leaving a 1/2" of the bow strip excess. sew the strips together at the center width-wise. (can you follow? luckily - i have pictures!)
step 4) fold the piece you just sewed into an "m" with the right side out or at top when looking at it from the end. then push this part through your loop (with the seam facing the bottom of the "m"). pull until the loop is directly over the middle of the bow strip (where we just sewed).
you'll end up with a perfect bow!
(i'm thinking i'll use the scraps to make another bow for a headband!)
step 5) remember the part of the belt that was 1/2" shorter than the bow strip ... this is where you'll add the female fastener. you'll add the male fasteners to another belt strip. follow the instructions on the fastener box. (i'll admit ... this took me a couple practice fasteners!!!)
here's a front and back of our progress so far:
step 6) at this point ... we just need to add the excess belt strips to fit the belt around your waist. you'll sew together right sides of your remaining strips w/ a 1/4" seam until your belt fits.
i removed about 3" from the male fastener strip (we created in the last step) so that i had a seam 6" from the both ends of the bow at my sides. w/ this 3" gone, it took one more 8.5" long strip to finish off the belt. (again measure to include a 1/4" seams.)
and there you have it just in time for your new years celebration if you're like me and not brave enough for sequins!!! one festive bow belt:
PS - i told wade today during lunch that i was feeling "hip-y" in all of my pictures. he said we'll it's probably the way you're wearing your hair - long and over your shoulders like that. i was like "huh". then finally i realized he meant "hippie". oh boy! yes - i am in fact looking "hippie":
PSS - big thank you to my sister leigh & bro-in-law brandon for my gorillapod! LOVE IT!!!

1 comments :
LOVE the belt! I think I will have to make one! Thanks B. :)
p.s. you don't look hip-y. your figure is to die for!
Post a Comment