


what a weekend!
wade and i are feeling super accomplished. our bedroom checklist is getting very slim: still waiting on supplies for our bedside lamps and now completely inspired to sand and restain the desk his parents brought us on saturday. but we can't stop staring at our new BOOKSHELVES!

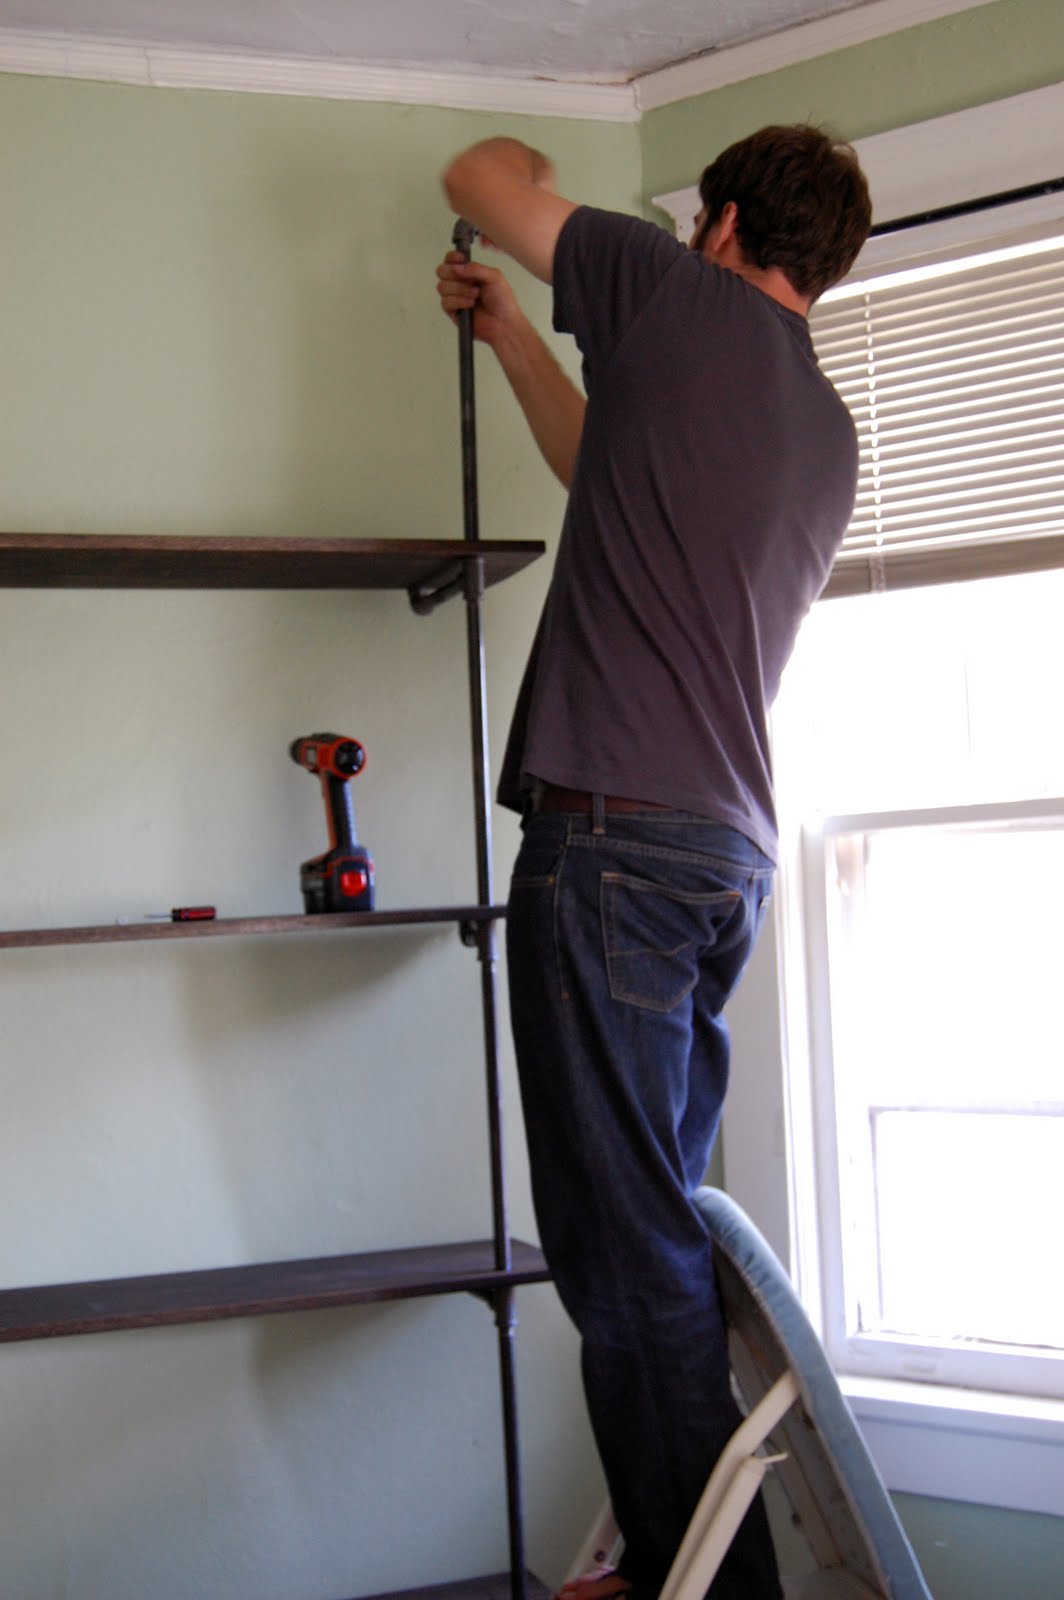
{it's a bit blurry ... i'm still working on manual focus.}
mission totally accomplished. have you ever seen anything so sexy in your entire life!?!
the final bookshelf is 8'8" wide by 7'6" tall and a little over 11" deep. {wade and i thought our ceilings were 11' tall ... well they're more like 9' ... so after purchasing supplies to build 5 shelves high we returned one shelf, 3 18" pipes, 3 8" pipes, 3 90º elbows, and 3 3-way tees. NOTE: always measure before. lesson learned.}
our {blog}spiration, the brick house, used 1/2" pluming pipe which the spray painted black. instead, we used 1/2" black iron pipe because our shelving unit needed to be super heavy duty for all of our books. this of course meant a bit more $$.
all in all we spent about $450 on the shelves. not bad considering earlier we were looking into these bad boys at 5' wide x 6' tall for $1095 on vivaterra.com.

fittings:
15 – 90º elbows
13 – 3-way tees
6 – base flanges
pipe:
15 – 18"
13 – 8"
3 – 9" (for the top flange connectors)
wood shelves:
4 – 1" thick x 12" wide x 10' long oak planks (cut down to 8′8″) ... {NOTE: this is where the bulk of our budget went}
other:
drill
1" hole bit
ebony minwax stain
medium grit sandpaper
dish soap + goo gone ... to clean up the pipes.
step stool
prep:
for the boards, we measured and drilled 3 holes into each plank along the front edge. we then sanded giving each board rounded edges and corners. and last stained the boards a lovely dark color. for the pipes, we cleaned all the grease off the pipes and goo gone-ed the stickers. (worst part of the whole process!)


{our fantastic work zone ... the communal front porch. it will be nice to someday have a garage!}

{and one of my lumberjack!}
build:
{and one of my lumberjack!}
everything screws together! build your base and then slide the first plank on - this secures the base so you can continue to build up. then wade secured it to the wall with some screws through the flanges. {for additional support, you can screw the base flanges into the floor as well - but that will have to wait until our apartment living days are over.}

{the before}


we LOVE it. in fact, you might find us sitting on the bed staring at it ... ha!
and amazing there's plenty of extra space on the shelves. wade is considering extra books that he needs. and together we're going to hit up rummage sales and flea markets for knickknacks we can use as bookends.
would you believe it we accomplished quite a bit more over the weekend too!?! in an attempt to gain some photography skills, i've been following wade around with his camera. a few fun shots from the weekend:

saturday morning i fixed up some apple almond waffles from scratch. wade and i agreed "waffle saturdays" are a new family tradition. {see, mom, we are using our waffle maker after all!}

our bed all made up in new linens from pottery barn. imagine it with 2 bedside lamps ... coming this week!


and last but not least ... this fantastic find (which doubled as wedding guest book) - just $20 at an antique store. and she works beautifully. wade copied a little poem ... "the birds and the bees" by joaquin miller. ironically appropriate for a newlywed bedroom? no ... it has nothing to do with those birds and bees.

18 comments :
Looks good. It'd pretty easy to build once it screws together.
I used plumbing pipe - not PVC - just FYI.
aw thanks! and thanks for the inspiration! definitely yours required more planning - ours was basic. but we just love it!!!
i'll correct - i don't have my plumbing lingo down!
hi there - thanks for the description - really nice results! my partner and i are building the same thing and are experiencing the problem some of pipes not screwing together evenly (i.e. they do not make a perfectly perpendicular line up from the floor and wood and top flanges will not sit flush against the wall).
Did you experience this problem as well?
i don't think we had a big problem w/ this. but i'll double check w/ my husband. i feel like we had one pipe which we had to return because of irregular threads.
please send a link when you finish! :)
I have that same typewriter in my office. It's one of my favorite pieces. We are planning some freestanding bookcases similar to what you have so graciously posted and I was wondering if you could tell me where your purchased the 3 way fittings?
Beautiful job!
hi bren. love that typewriter. we used it as the guest book at our wedding. and now my hubs types letters on it. pretty cute. we purchased all the supplies at home depot. i wish i had kept a tally of cost. but i think they were about 1.50 each. good luck. send pics! :)
Great blog!
As a design comment, it would be nice if the text was a little darker so it's easier to read against the white/light background. Some of us have bad eyes...
better? my husband mentioned this too! the trouble w/ doing my own blog designing. :) thanks for stopping by!
If it's not your chair, what's it doing in your yard? Why would you even mention it, beyond the embarrassment of being seen owning plastic lawn furniture.
Waffles from scratch? You mean you mixed flour sugar and milk all by yourself? How the hell else do you make waffles?
We get it. You've got a need to advertise your illusion of a perfect life. You eat nothing but artisan asiago on organic frizee with walnuts picked by squirrels.
Get over yourself hipster, the world doesn't care about your life.
Oh I feel so sorry for the owner of that completely rude comment above. They really must just be either a horribly angry human being who can't contain the irrational thoughts or they are terribly jealous of your craftiness and love for your life OR they have a terrible case of turrets. I think it's turrets. Because surely no one would just blog hunt just to say mean things.
Hey! Thats my chair!
WOW Anonymous- Why so angry? I am sorry about the way mom and dad treated you in your youth. Sorry things have not turned out the way you wanted them to & SORRY the world doesn't care about your life.
I'm sorry, Blair. My glorious beard makes people think you're a hipster.
Raw (unpainted) iron pipes look great, but how are you dealing with corrosion/rust? Curious your approach.
I've yet to find a solution myself. Urethanes and clearcoat paint work, but leave a glossy finish. Are you living with the rust, or did you coat them with something?
Btw, that's a great finish on the wood, looks good.
thanks for stopping by. i went home and inspected our pipes lat night as i hadn't noticed any rust! sure enough there is a bit of rust in a couple of spots. i kind of like the look of the rust. if it gets out of hand, you could sand down those spots, use mineral spirits to wipe away excess and after it dries, paint w/ an iron compatible rust preventing paint mixed to match the original color of the pipes. good luck! are you planning to build your own bookshelf?
Hello! Wow, your shelves look great. I'm about to build a set of my own and I stumbled upon your blog while look for plans! Thanks for posting about your project!
I was wondering if you might answer a question for me. The materials list notes that the vertical pipes between each shelf are 18", which adds up to 90" total. Since your shelves ended up 90" tall, does that mean that the tee junctions between each vertical piece add no additional height to the shelves? I'm trying to draw up the measurements for my own shelf and this is the last thing I need to figure out!
Scott - I am embarrassed to admit that we never even thought about that!!! The Tees actually add about 1 1/2" to each shelf. I'll update the blog post!
Just found this Blair!
LOVE it and I didn't realize you posted a tutorial! We are definitely going to have to try to recreate this!
SIGH… not sure WHEN but some day!
Post a Comment