i bought the supplies for this little project way back during nashville's march flea market. wade and i had a looooong list of flea market hopefuls - remember? but we also have a long list of bills to pay (including taxes - boo) so we only brought $20 w/ us. and we came home w/ several new records for wade + 5 old yard sticks for me!
inspiration: i am loooooving this ruling the roost lampshade from roost living. too bad i don't have 495 bones to shell out.

materials:
* several wooden rulers or yardsticks (i should have counted! i think i used 7 yardsticks!)
* saw + sandpaper
* lamp shade
* masking tape
* glue gun
1 // measure the length of your lampshade and cut your rulers so that they are a little longer than your shade. my rulers needed to be 9" long - perfect ... each yardstick made 4.


2 // sand down those jagged edges.


{smooth vs rough}
3 // using masking tape, align the tops of the rulers w/ the top of the shade. begin with one ruler and then add another and another around the shade.
*** i found that my rulers weren't a perfect fit - BUT the yardsticks at home depot are wider than a standard ruler. w/ 2 home depot rulers, i had a perfect fit!
*** i found that my rulers weren't a perfect fit - BUT the yardsticks at home depot are wider than a standard ruler. w/ 2 home depot rulers, i had a perfect fit!

4 // once the tops are in place, use masking tape to evenly place the bottoms of the rulers to the bottom of the shade. to evenly space my rulers, i tried to align the ruler perfectly perpendicular to the table. however - i went around the shade quite a few times making sure the spacing was as close to perfect as possible.

5 // unattach the bottom of one ruler so that you can lift it while keeping the top connected ... like a toilet seat. add your hot glue. then close the "toilet seat" - carefully replacing the bottom of the ruler to the base of the shade and maintaining your spacing. work you way around the shade (remove the masking tape as you secure each ruler.)

the finished product:


we're pretty excited w/ the result! and our little office space is finally coming together:

of course, i'm still on the hunt for a few cute accessories (and a plant for that empty pot by the lamp - pathetic!):


1 // a horse hair brush as a pencil tray
2 // yes - again a chemistry set (i know i posted about it yesterday)
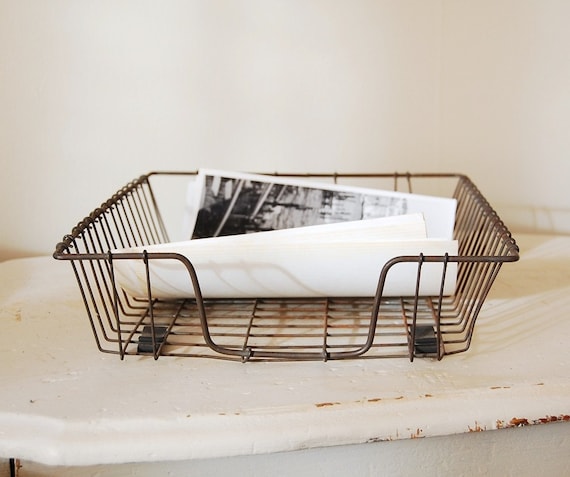
3 // and an old wire desk tray


1 // a horse hair brush as a pencil tray
2 // yes - again a chemistry set (i know i posted about it yesterday)
3 // and an old wire desk tray
did i mention this little wooden filing cabinet we found on craigslist for $10? w/ a good sanding, a bit of gray/blue stain, some chrome spray paint for the fixtures, and a couple cute pieces of scrap fabric ... i think she's looking a-ok. i might take the sander to her once again - to give her a bit of wear. what do you think? (i'm becoming an expert sander. we also refinished that desk a few weekends ago.)


12 comments :
Really, really cool Blair!!! I can't wait to try and make this for my place! My mom just saw your site and wants me to forward her your link:-) You're the coolest!!!!
-Taylor
Wow - I really love the lampshade! And the brush turned pencil holder is just genius! Thanks for the wonderful ideas.
- Andrea
Love it! What a neat idea--looks very vintage and trendy--pottery barnish. Happy Easter.
wonderful idea. adding to my pinterest. thank you!
This is SPECTACULAR! i am redoing my office/creative area and i want a hanging lamp, this would be SOOOOOO perfect! I am a new follower and found you from your feature over at diy showoff-congrats!
thanks folks! i'm pretty thrilled w/ how the lamp turned out - and even more thrilled that it's my husbands favorite addition to the house yet! can't wait to explore your blogs! b
Hi Blair! What a cool lookin' shade! Your blog is fabulous as well. I linked this to my yardsticks project post too today, well done!
I love this lampshade project...very clever. I saw the link to your project over at Inspire Me Heather. I'll be back to check out more of your fabulous projects:-)
@Heather & @Betsy - thanks for stopping by ladies (and sharing Heather). loved the other yardstick projects as well!
hey blair love the lamp, put some rosemary in that pot it smells so good and i think is lucky ha ha ;)
ooh good call! think it will grow w/o too much sunlight? that room is super dark! thanks for stopping by!
I adore your lamp! Pinning :)
<3 Christina at I Gotta Create!
Wildly Original Linky Party is open.
Post a Comment