


are you ready for this!?! i don't want to overwhelm you ... so i'm going to post each separately over the next few days.
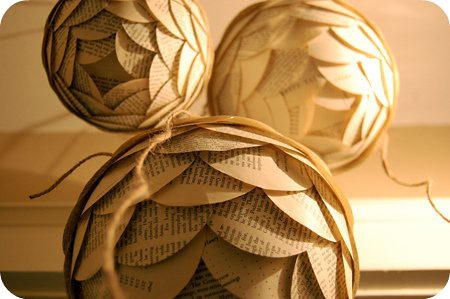
starting with my favorite ... these beauties:

i'm calling this {craft}ernoon "old book mistletoe". and must give credit where credit is due. i found inspiration while wandering pinterest.com - but they were originally posted by cathyofcalifornia.com. one of her store displays featured in the new york times. pretty pretty.
with a husband that is a major book-y ... these will go straight to his heart. (2 of my other projects were book related too! decorating theme!) {my mom said "they're cute. but they won't work." hee hee - she's probably right since they aren't traditional mistletoe. (don't worry ... i have some of that too!)}
materials:
* an old book or newspaper - again with a husband that LOVES book (see
bookshelf DIY) i couldn't tear apart just any book. i found an old book of
book reviews at goodwill. this way i didn't tear up one person's masterpiece.
* Styrofoam balls - found at michaels or any other craft store.
* glue gun
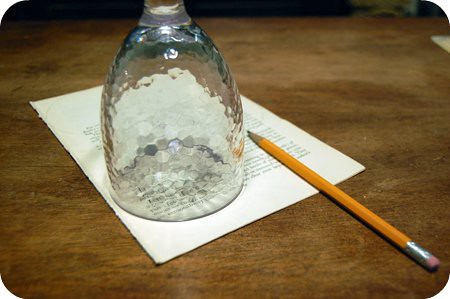
* scissors, pencil + cup for making a template
* screw and string for hanging. (i used twine ... i have loads of it left over
from our wedding.
and here we go:
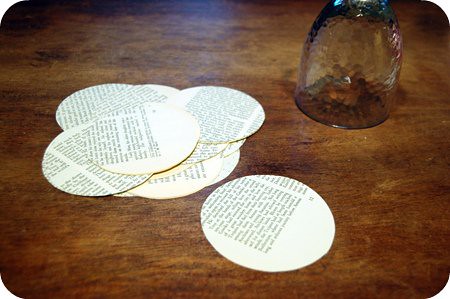
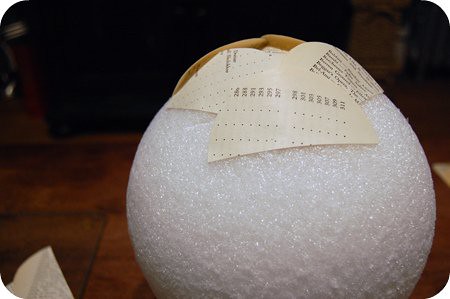
step 1) trace onto your old paper several circles. or if you're lucky you'll have a hold punch big enough! :) you're going to need approx 20 full circles. keep 2 full circles and cut the rest into half moons.
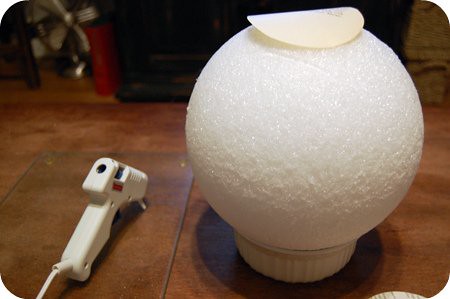
step 2) with your glue gun, glue 1 of your full circles at the very top of your Styrofoam ball. i glued it in all 4 "corners". (to keep it from rolling around like mad - i balanced the ball in a bowl.)
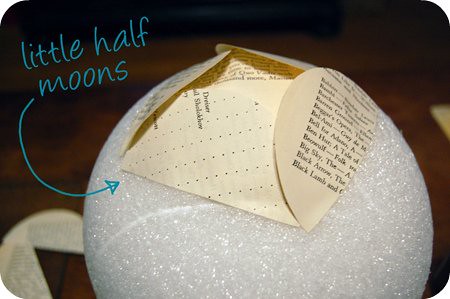
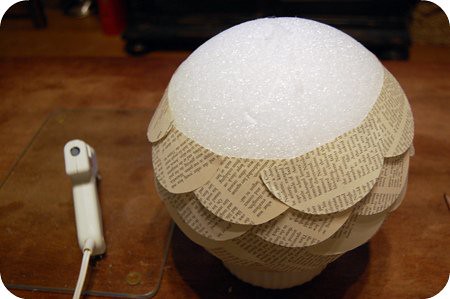
step 3) then work your way from the top to the bottom gluing down your half moons. apply the glue to the straight side. after your first row - stagger your other rows as best possible. when i was halfway down, i flipped the ball in the bowl so that i could see where i was gluing.
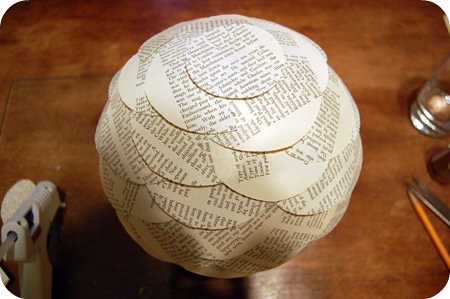
step 4) apply your last full circle once you get to the bottom (now the top!).
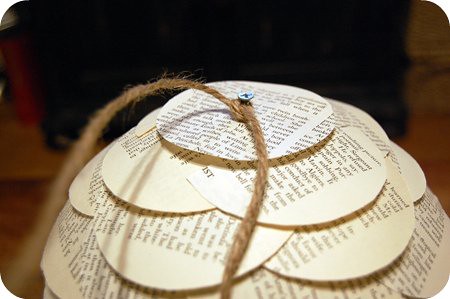
step 5) now to hang it. i didn't have any hooks at the apartment. so i simply added a screw at the very top (the former bottom). and i added some twine.
voila ...
i made 3 for the entry hallway to the apt. but i really really really want to make several more! addicted to them!
and one more - a favorite view!
it's beginning to look a lot (okay a little more) like christmas! :) more christmas DIYs coming soon!

9 comments :
Ok, i found your blog off of Joanna Dixon's blog! How SUPER CUTE are these?? I'm in love and want to do them immediately! Your craftiness is quite inspiring (also saw pictures of your wedding - my sister is amanda crawford). Hope you don't mind if I start blog stalking waiting to see new craft projects!
hi lindsey! thanks for checking out the blog. and thanks for your compliments. :) ps - i blog stalked. congrats!
these are fabulous! I may be copying this project. :)
http://ellenmallerneebarnes.blogspot.com/
aw thanks. i haven't decided if they will come down after the holidays. they might become ... art. :) now to make more!!!
I love these! I'm definitely adding them to my list of projects. Thank you for the inspiration.
oh good! i had to make them the instant i saw them. :) (and they are definitely still hanging in our entry way!)
Wow, u r a genious. Love them and can't wait to try making them. Thanks for ur idea :)
Doing these for my middle school library! LOVE THEM!
what an adorable idea! i thought they would be cute in a bookstore - but library - ADORABLE. merry happy!
Post a Comment