


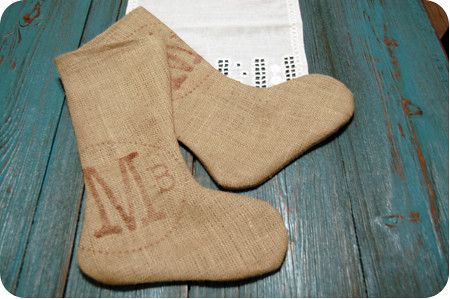
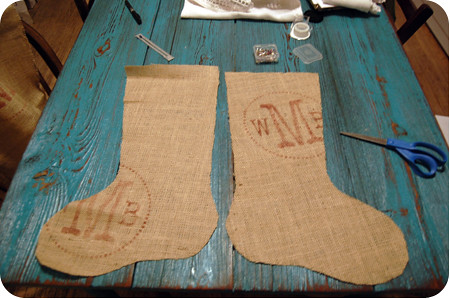
i haven't added the finishing touches {a sprig of boxwood & each of our separate initials} ... but i wanted to share them with you. this way - you still have time to make some of your own. besides - who am i kidding ... i'm never really finished with a project! i will continue to tweak and add to these for years and years to come!
i have been upcycling things from our wedding. {i really should snap a few shots and share. i will this weekend!} for this project, i decided to upcycle a table runner from our reception for the burlap:
and the extra fabric from wade's tie and pocket square for the lining:


here's what you'll need for each stocking:
* 5/8 yard 36" wide burlap for the stocking
* 5/8 yard 36" wide scrap fabric for the lining
* 1 spool all-purpose thread in a color to match the burlap
* 6" of ribbon for the tab
you'll also need:
* straight pins
* a fabric marker
* scissors
* sewing machine (or needle and thread AND patience)
* iron/ironing board
* ruler
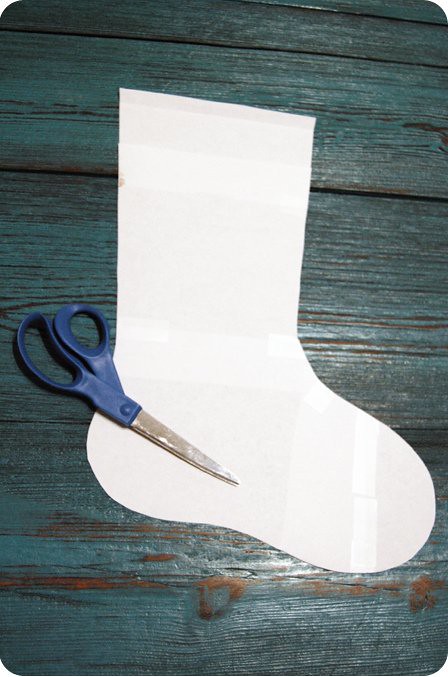
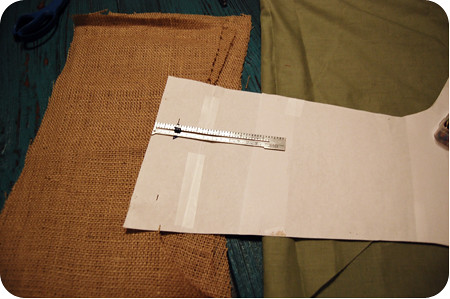
* and a pattern of your stocking. i found one at amybutlerdesign.com and then modified it to look exactly like the stocking i had in mind. add 1" of extra leng
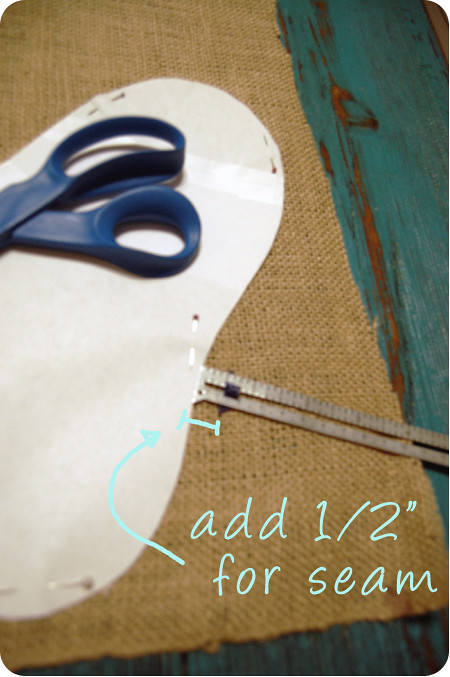
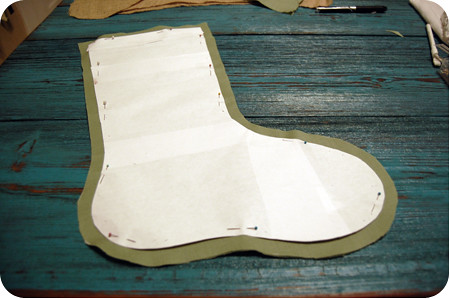
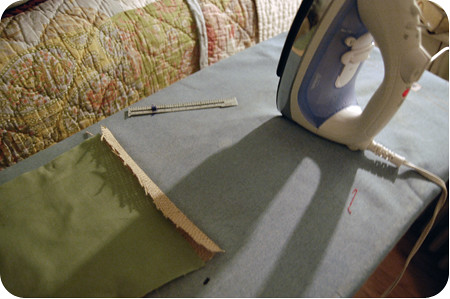
step 1) cut out your pattern. you will need 1/2" extra fabric around the edges for a seam ... you can either add this before you cut or after {i chose to do it afterward - see step 2}.
step 2) fold your burlap in half lengthwise matching edges. place stocking pattern on the burlap and pin. i wanted the stamp to fall in different places on the front & the back and on each stocking (i made 1 for each of us). so be mindful about placement. {if you didn't include the add'l 1/2" for seam ... be sure to mark it now.}
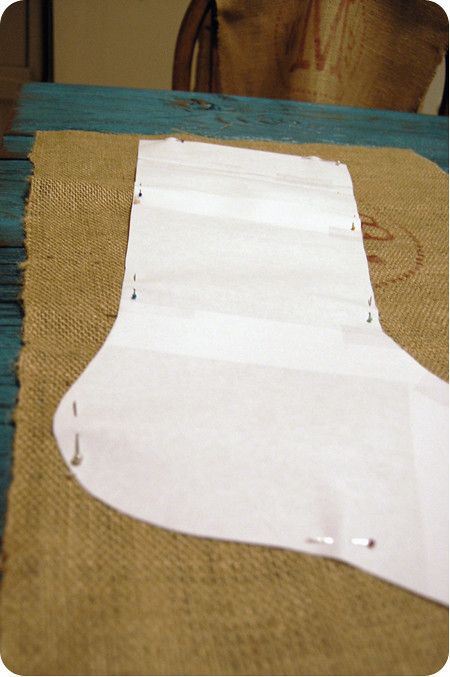
step 3) cut out your 2 stocking panels.
step 4) measure 1" from the top of the stocking and either cut or fold this part down for the lining pattern. (i folded instead of cutting bc i'm going to keep the template for future little munday stockings.)
step 5) fold lining fabric in half lengthwise with wrong sides together. pin again {remember to mark if your pattern didn't include the extra 1/2" for the seam!}

step 6) cut out your 2 lining panels.
step 7) match stocking & lining pieces by direction. for both the front and the back, line up the burlap and the lining w/ right sides facing out. remember your lining will be 1" shorter than the burlap so start at the bottom.
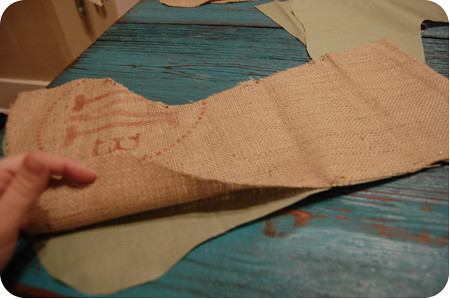
step 8) the excess 1" is to create a hem at the top opening of the stocking. again for both the front and the back, fold the top of the burlap 1/2" toward the wrong side and press. then fold it again 1/2" (which will overlap your lining) and press.
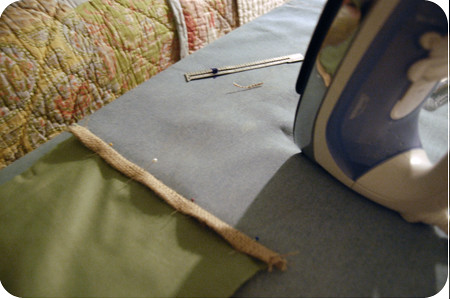
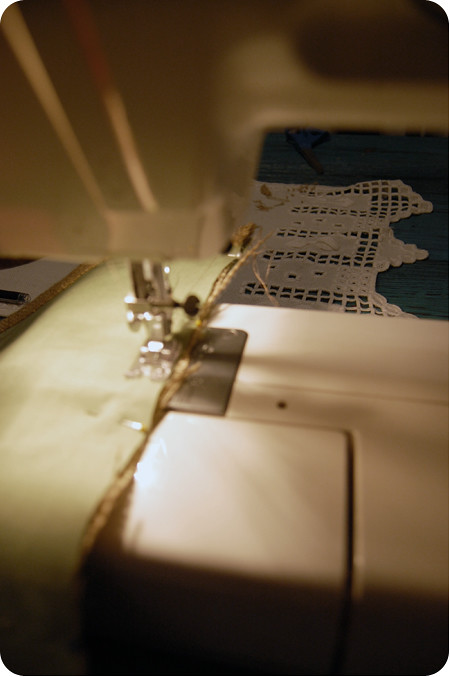
step 9) stitch 3/8" from the top (so about 1/8" from the last fold you just made). easy hem.
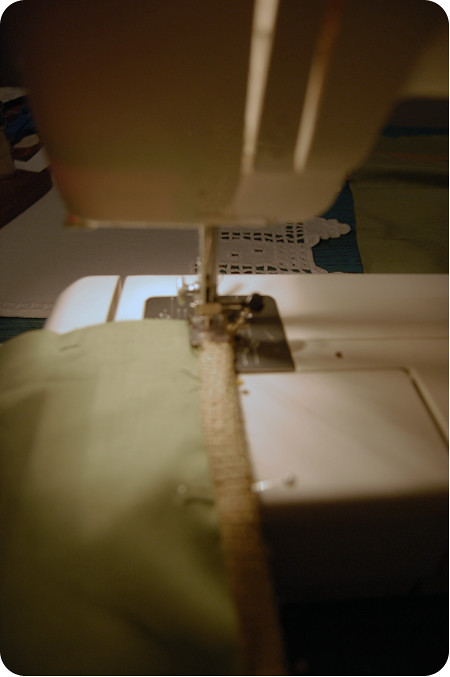
step 10) match your front and back pieces w. the lining sides facing out and pin. (start at the top as you'll want the ends to match up perfectly here and can adjust at the toe.)
step 11) stitch 1/2" around the raw edge starting at the hem on one side and ending at the other.
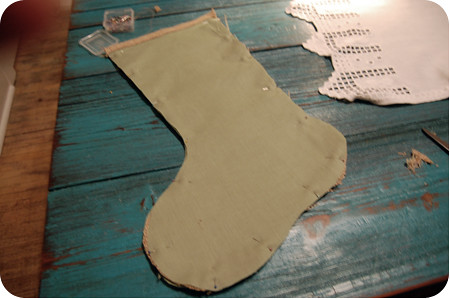
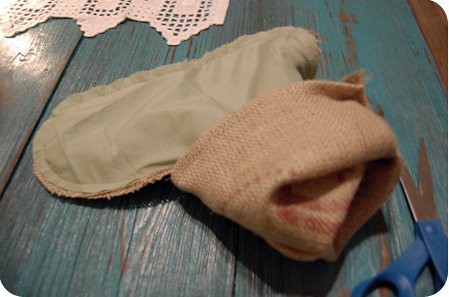
step 12) reverse your fabric so that the burlap is now on the outside and iron!
step 13) you'll want to add a little tab to hang the stockings. i cut a 6" piece of ribbon in half and the looped each piece and stitched it at the top at the back (the same side as the heel). and you're finished!
now for the fun part ... adding decor. because our burlap included the stamp from our wedding runners ... i think i'll keep it pretty simple. though i do want to add each of our initials. but think of the possibilities! felt, ribbons, twine, buttons. yay!
as always, send pics. :)
{i apologize for the quality of some of these photos. 1) it was late. 2) something's going on with our lens and the focus. time to invest in photography lessons? maybe. time for a new lens? definitely. i'll have to start saving my blood money* each month.}
* blood money - our non-conformist version of fun money

3 comments :
I am a total novice when it comes to a sewing machine, but your instructions were wonderful. I made 4 stockings and they came out great! Thanks so much for your posting!
i LOVE this project. did you do the monogram printed on the original table runner? i want mine to look like yours!!
yes ma'am. i spoke about it a little here: http://www.acaseofthemundays.com/2010/12/crafternoon-burlap-runners.html i created the monogram in illustrator and printed it on transparency paper. i used a hole punch to make my little dotted circle. good luck! and thanks.
Post a Comment